Social icons

Showing posts with label Product Launch. Show all posts

How many times have you accidentally swiped mascara on the bridge of your nose?  For me, that's every other day when I apply mascara on my left eye.  Lancôme recognized that an average mascara users are not completely satisfied with how they apply mascara.  They also sees that women want their mascara to reach all the lashes from root to top, even in tricky areas.

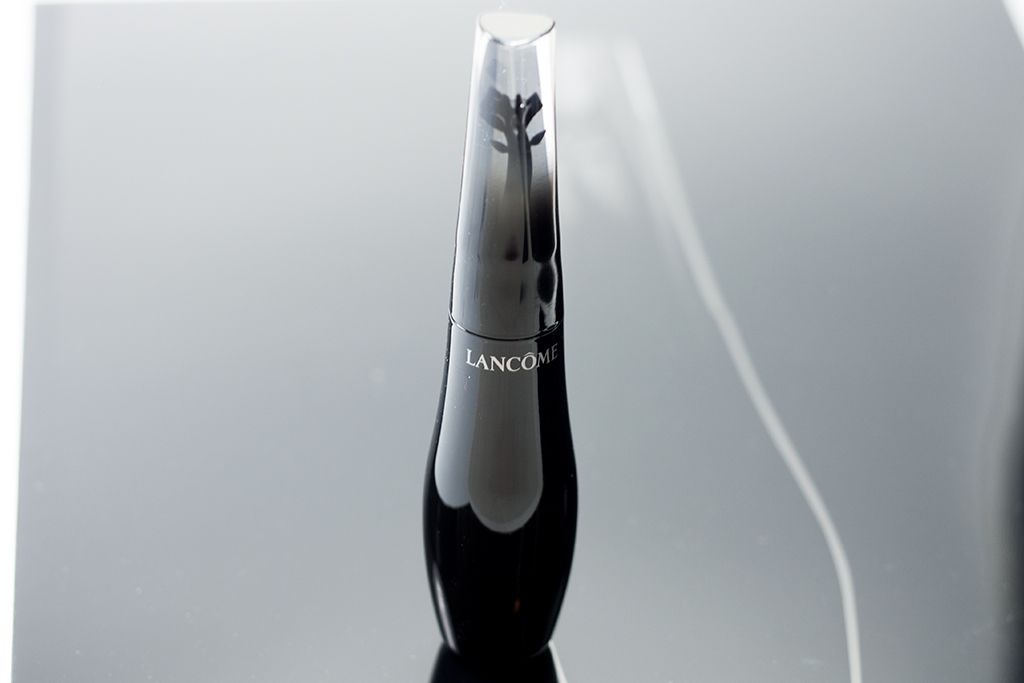
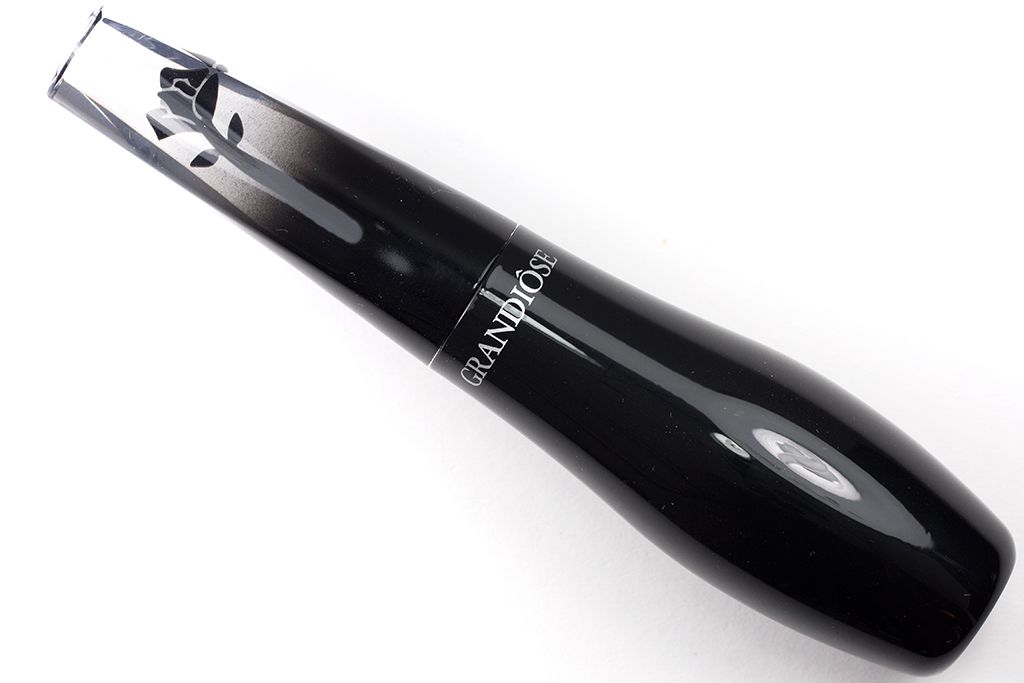
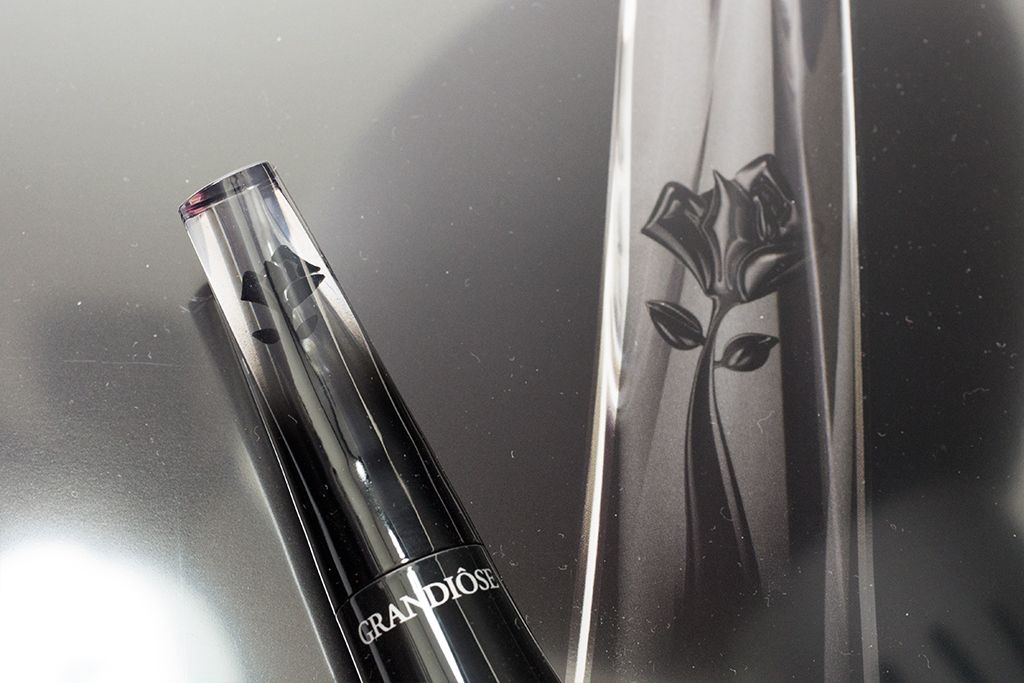
Their answer to these problems is Lancôme Grandiôse Wide-Angle Fan Effect Mascara (CA $35 / US $32).


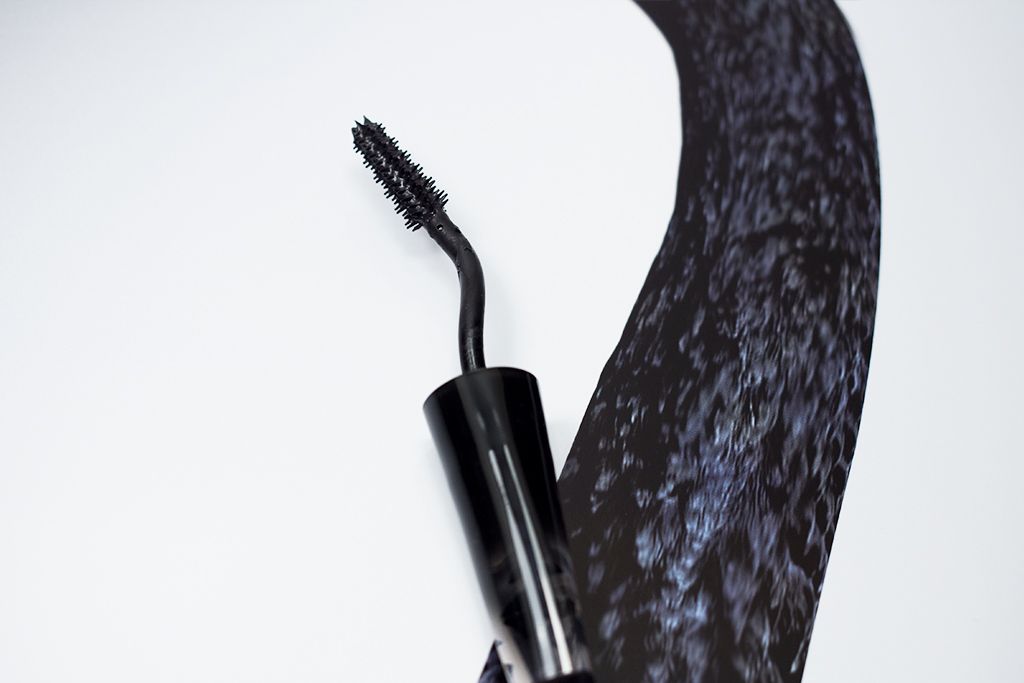
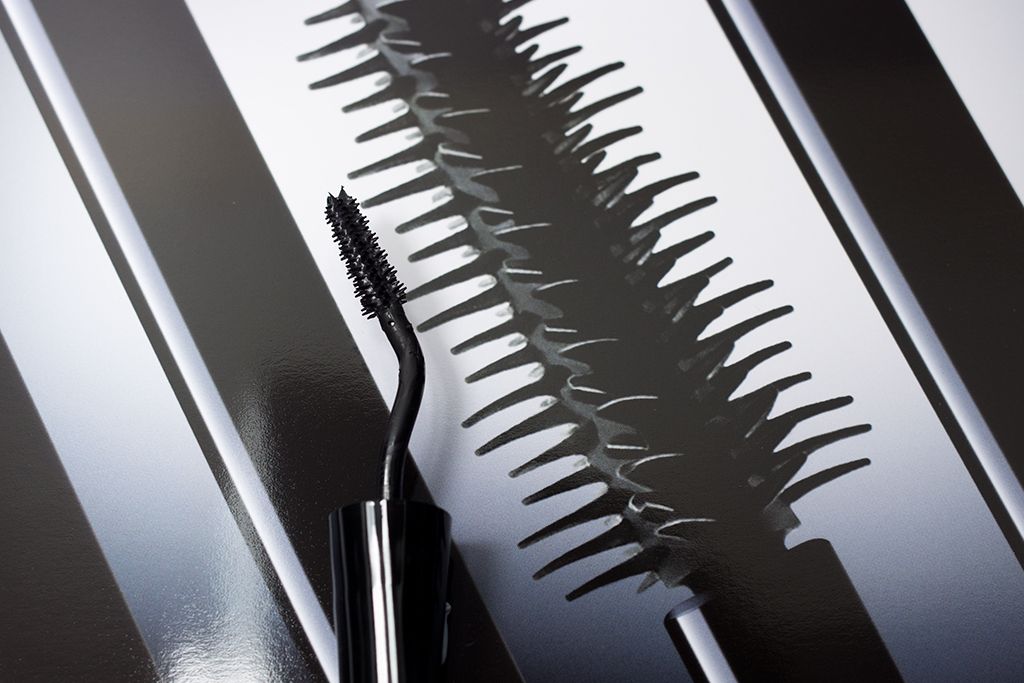
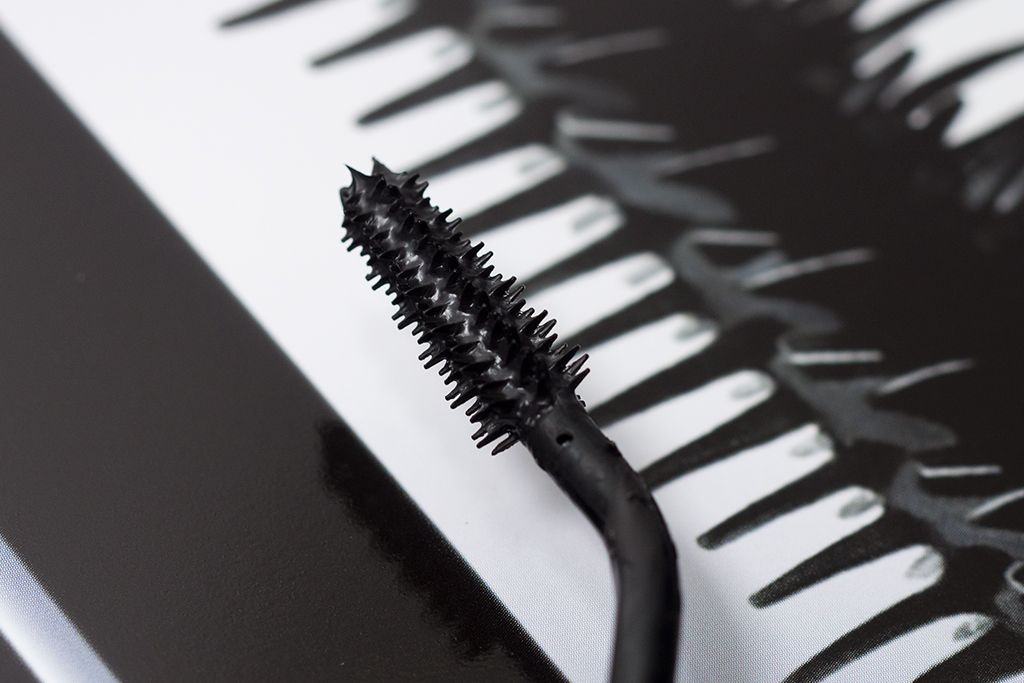
While bending the straight mascara may help with the application process, it's not the best solution because they're usually not flexible enough to reach all corner without trouble.  Lancôme Grandiôse features a patent-pending Swan-Neck Wand that is short and twisted and is described to be the "ideal shape".  The 25° curved stem is designed to "intuitively adapts to the contours of the face".

Even just after the first try, it was apparent that the Swan-Neck Wand was very intuitive to use without breaking my wrist.  I think it is less of an hassle than one with a traditional wand.  Also with this curved wand, every time you twist open the mascara, it mixes the formula for you so you don't have to do it.


This mascara also comes with a smaller brush head, with bristles "shaped like half petals" that will coat every lashes from root to tip.  I was able to reach to lashes from either corners, as well as my bottom lashes.  I didn't notice if I smudged mascara on my lid, which is what this precise brush head is supposed to achieve.

The formula is quite nice because it does it all (volumize, lengthens, and defines).  However, I wouldn't say it is the best in all 3 categories, it's more of an all-rounded mascara.  It has great staying power but it is easy to remove.  It also doesn't make my lashes hard like a boar bristle brush.

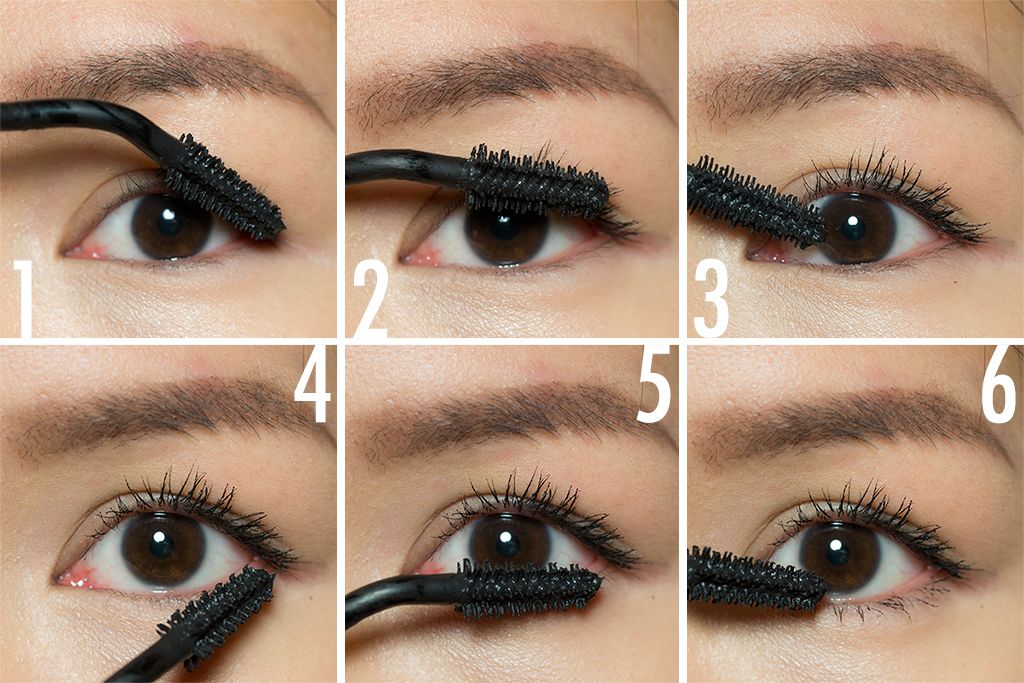
To apply Lancôme Grandiôse, I start with the upper lash line and (1) apply mascara to the outer corner because it has the most formula at this time.  Then, I would (2) rotate the wand slightly and move to the centre of the lid and coat the lashes in a zic-zac motion.  Next, I (3) use the tip of the mascara to get to the small lashes in the inner corner.  Finally for the bottom lash line, I would repeat all the steps above, again from the outer corner.


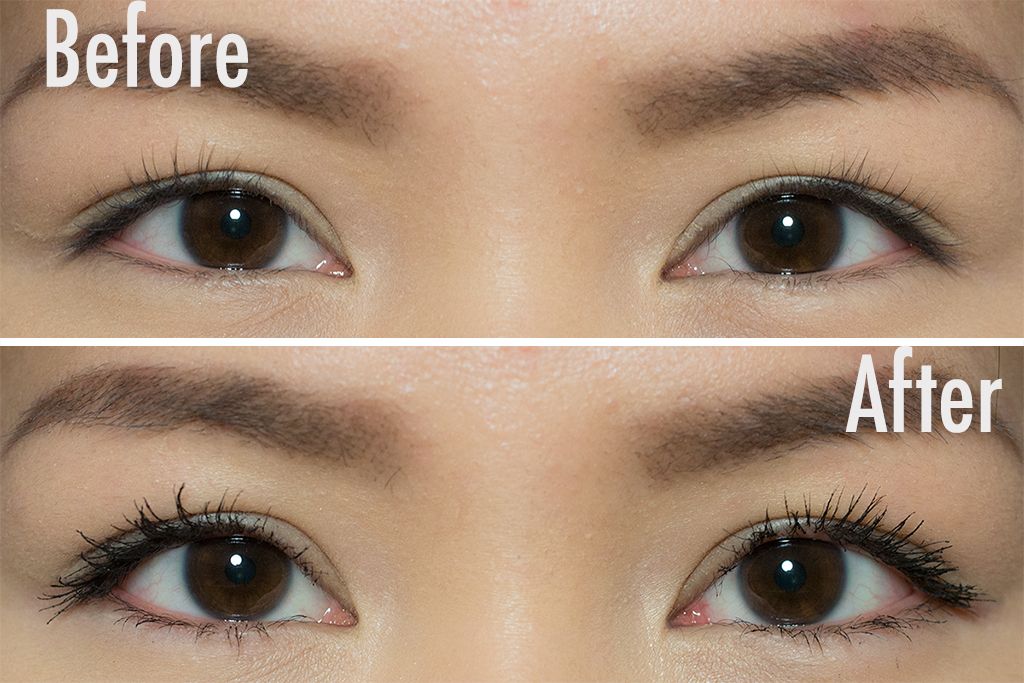
I quite enjoy the application of this mascara.  It volumizes, lengthens, and defines.  It's not the most dramatic mascara ever, but that's not to say it's not a good mascara.  Even after 2-3 coats, my lashes are still quite soft.  The staying power is pretty good with minimal smudging on my folded eyelid.  Yet, it is super easy to remove (I just use a cotton pad soaked with the L'Oreal Sublime Soft Gentle Micellar Solution).  I would recommend this mascara if you're fed up with bending your mascara wand and just want an easy way to apply.  Lancôme Grandiôse is now available at counters, lancome.ca / lancome-usa.com and Sephora!


Do you twist and turn and bend to get to all the lashes?  Do you think this innovative wand and precise brush will be the answer to solve your mascara problem?  I'd love to know :)

Until next time,


x Rica


*Disclosure: Products mentioned in this post were provided to The Office Chic for review consideration.  As always, all the opinions expressed here are my own and are in no way influenced by any advertiser, affiliate, public relations firm or brands.

Lancôme Grandiôse Wide-Angle Fan Effect Mascara | Review, Photos & Demo

August 15, 2014 • 11 comments
Images from Urban Decay

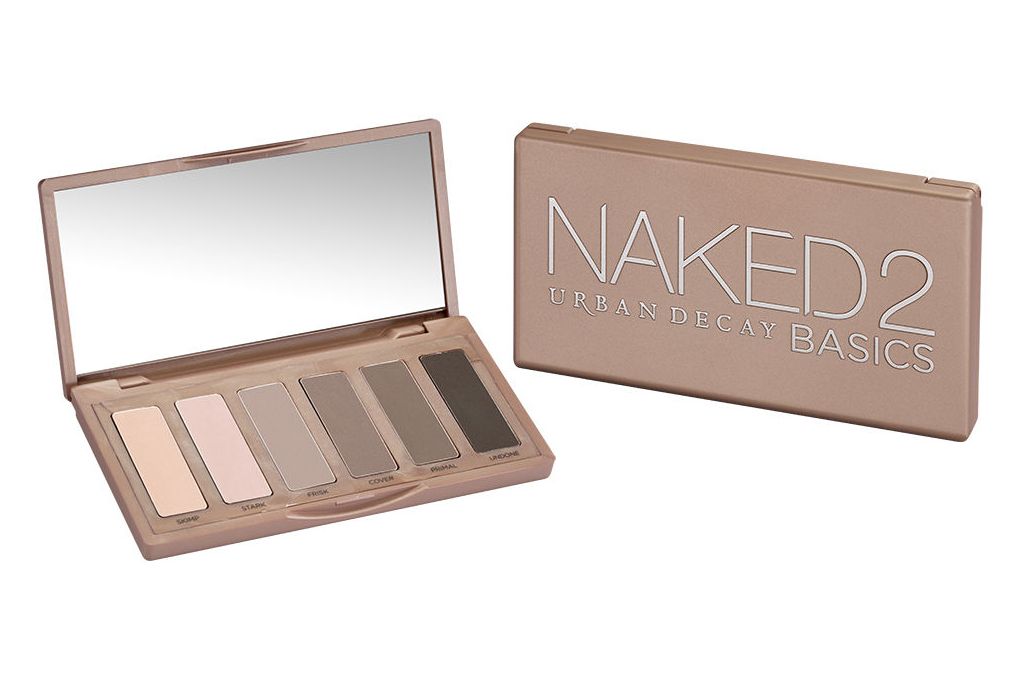
UDers rejoice!  We have loved all the NAKED palettes from 1 to 3.  Many of us love the NAKED Basics palette even more.  A lot of us often say, "I wish there are more shades in the NAKED Basics palette".  Guess what?  Urban Decay heard us and they will be releasing the NAKED2 Basics soon.

Images from Urban Decay

Every NAKED palette has a theme and will feature neutral shades that fit the theme
Images from Urban Decay

Images from Urban Decay

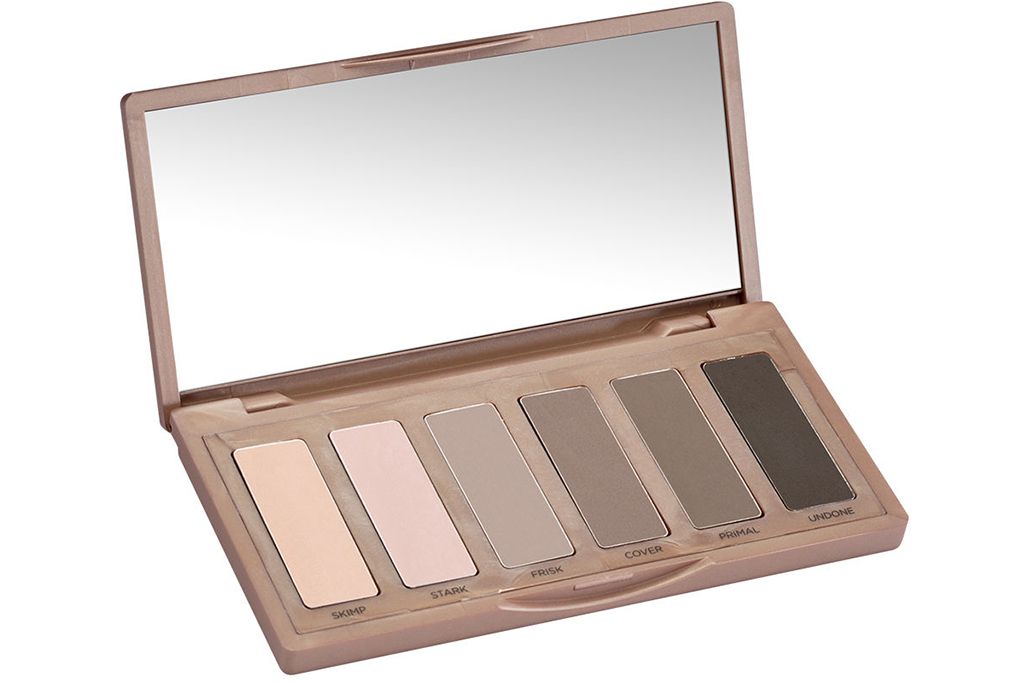
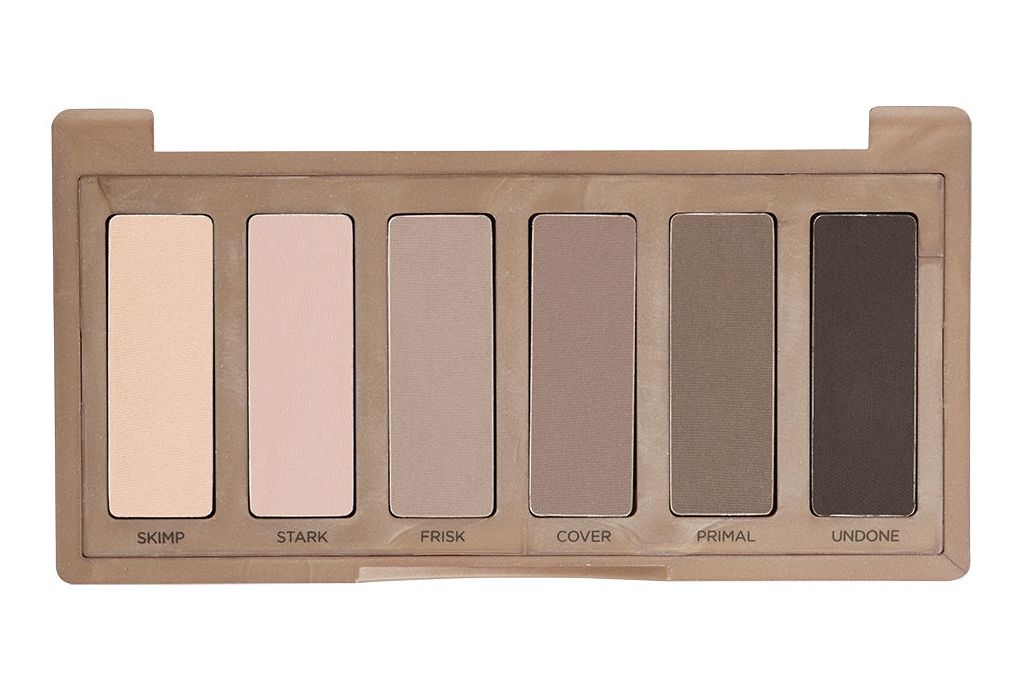
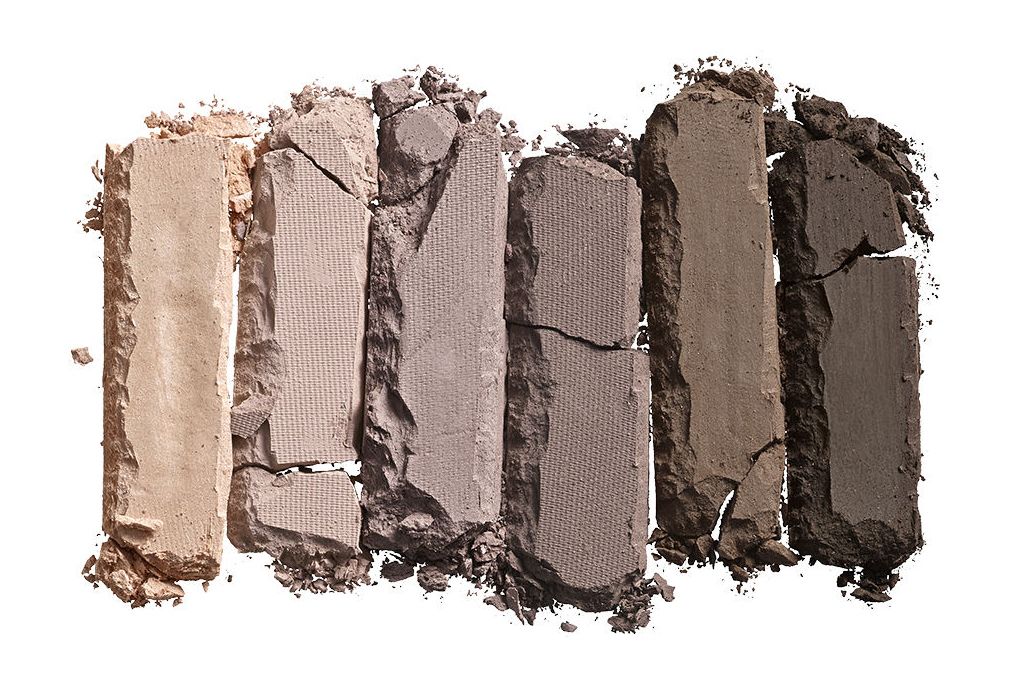
Now the new NAKED2 Basics features "6 TAUPE-hued matte neutrals" (they said that but they're not actually all matte):
  • Skimp: pale nude satin
  • Stark: nude-pink matte
  • Frisk: warm gray matte
  • Cover: muted red-brown matte
  • Primal: muted brown matte
  • Undone: deep, smoky brown matte
Like the NAKED Basics palette, it is designed to be suitable for everyone, every skin tone.  With eyeshadows, you can count on Urban Decay to give you richly pigmented and buttery smooth shades.

I do own all the NAKED palettes, but I still want this new one.  I can't wait when it becomes available!  I have already signed up for notification.  Hopefully we hear more from Urban Decay before it's available for sale (more than just an Instagram teaser), because we know it's going to fly off the shelf.

Shop this story...


Until next time,


x Rica


Urban Decay NAKED2 Basics is Coming Soon! | Beauty News

August 10, 2014 • 3 comments

Launch of the Most Innovative Eyeliner


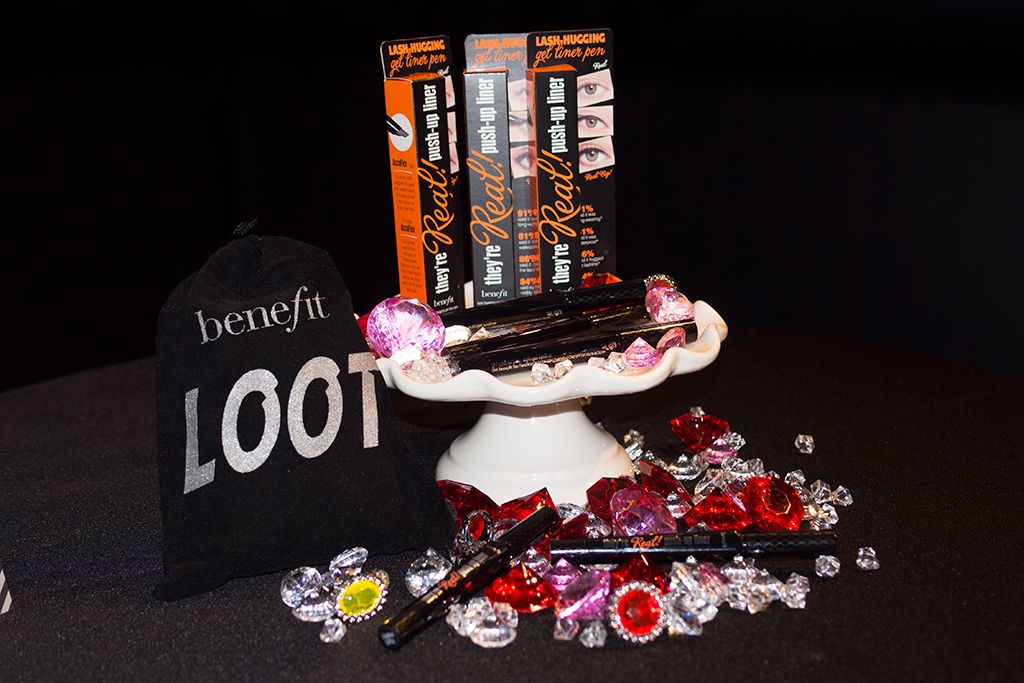
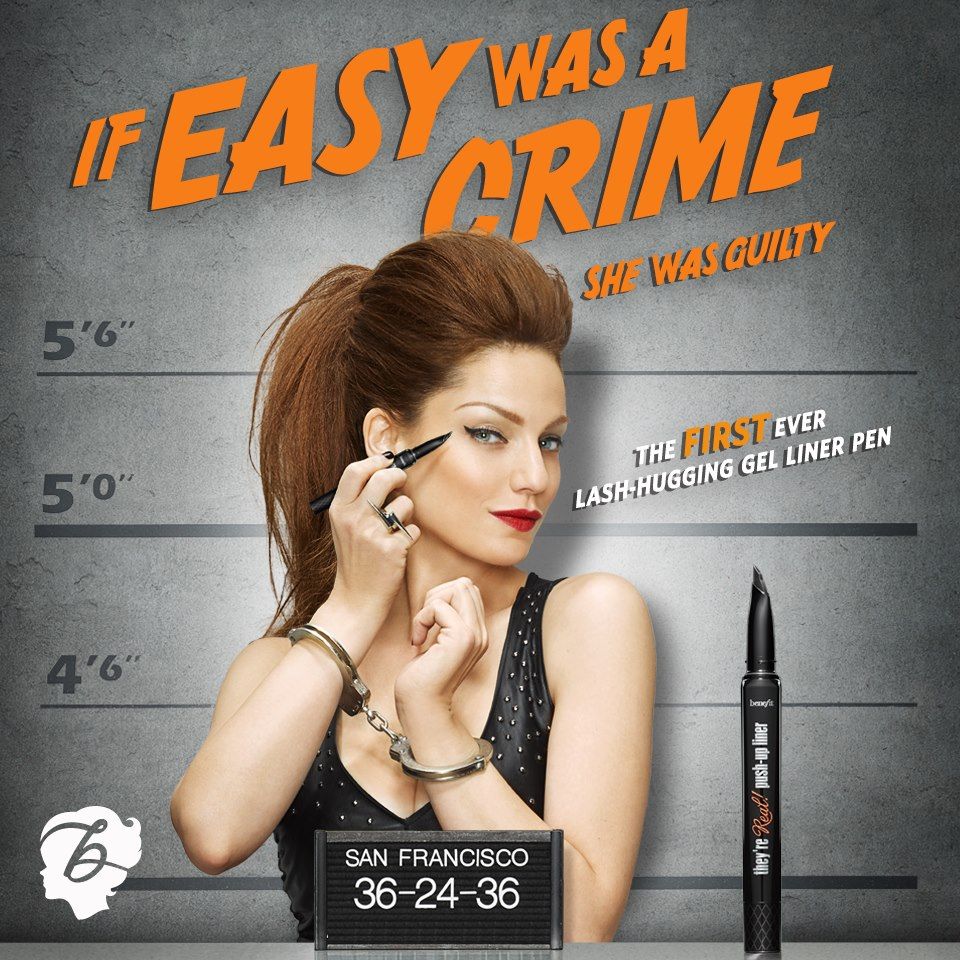
Benefit said it's their biggest innovation in history.  After 5 years of development, the Benefit They're Real Push Up Liner (CA $29 / US $24) is finally launching globally this Friday on June 27, 2014!  

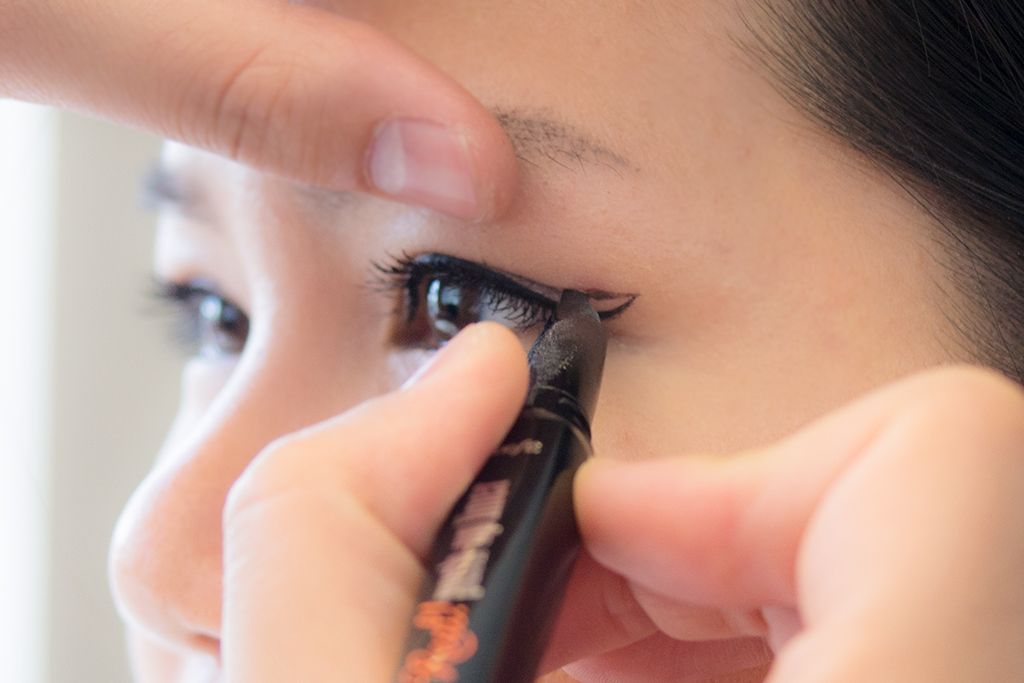
I was fortunate to have previewed and tried the product before its release.  It is probably the most unique eyeliner I have ever used.  Believe me when I say I have tried a lot of liners, but never have I ever seen an applicator like Benefit's patented Accuflex tip.  The gel formula comes out from within the applicator with just a few twists.  The flexible tip is designed to be lash hugging, which allows you to get as close to your lash line as possible.  It also gives great control that you can get the line as thin as your like or as thick as you like.

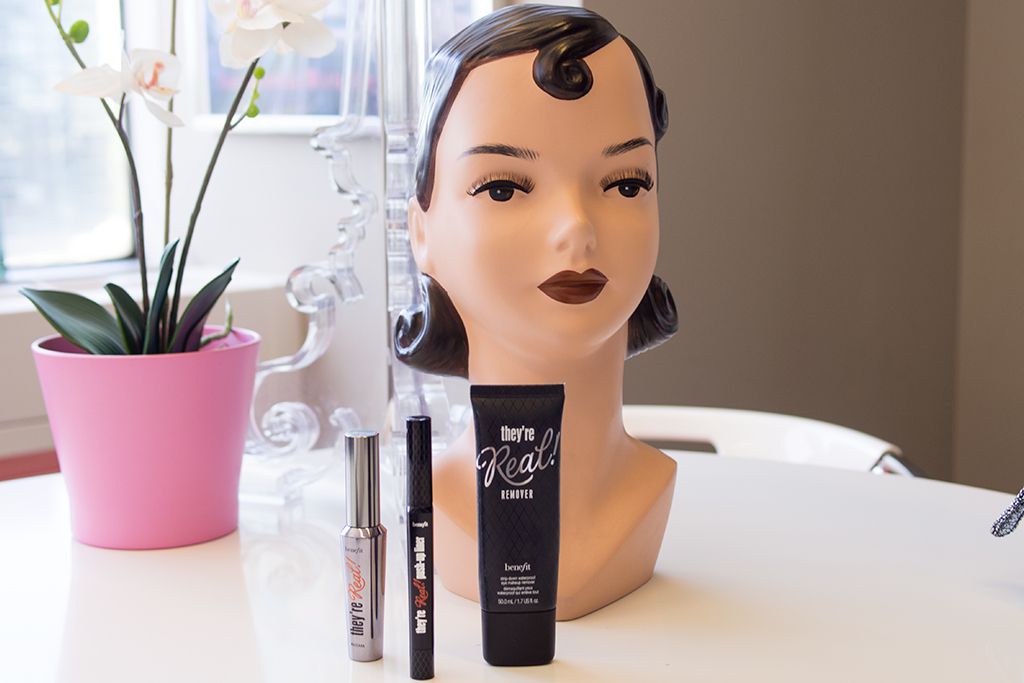
From L to R: They're Real Mascara, They're REal Push-Up Liner, They're Real Remover, Simone ;)
The formula in this liner is phenomenal.  It's smooth, creamy, and pigmented, which are basically what you would want from a gel liner.  The staying power is out of this world.  It stays put all day (even on the waterline) and it doesn't smudge.  To take it all off, I would use the They're Real! Remover (CA $22), which has now become my holy grail eye makeup remover.

When Benefit comes up with the concept of They're Real Push Up Liner, they want to create something that is fool proof and easy to use.  That woman can apply it in seconds.  I find that it is very easy to get a one stroke liner.  The trick is not to drag or push too hard, and to also ensure that there is enough product on the tip to apply.  That way you will get a smoother and quicker application.  That being said, also be aware not to twist up too much; but if you do, not to fear, you can just wipe the excess product on the back of your hand and dip it when you need it.

Eyeliner for Hooded Eyes / Folded Eye Lids

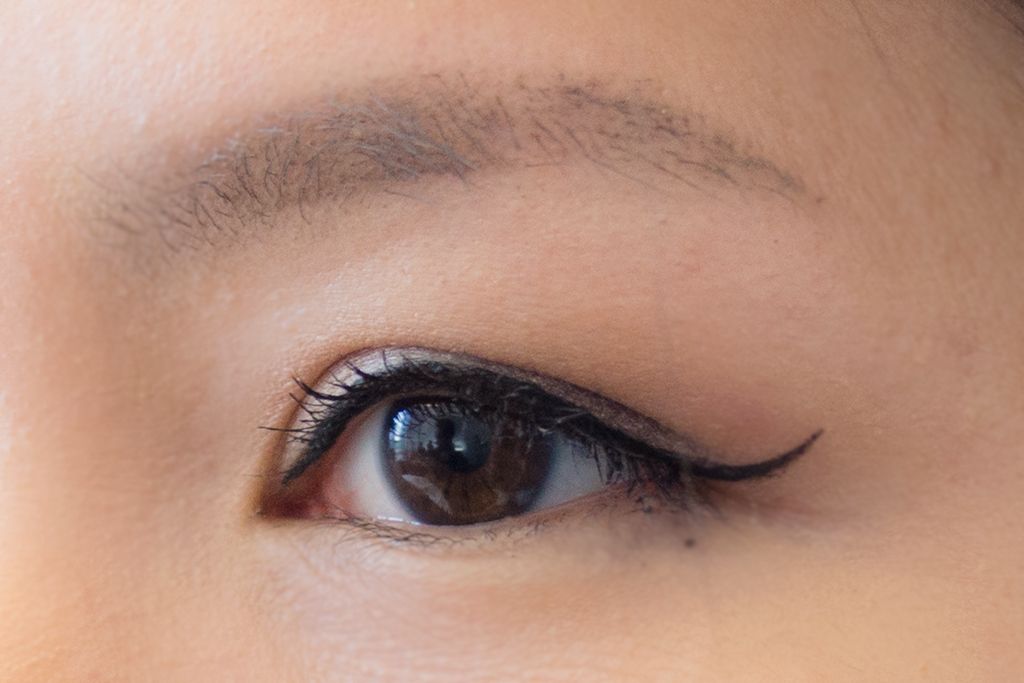
I can do a regular winged liner, no problem, and with this, it just makes getting ready in the morning so much more faster.  However, the regular winged liner doesn't necessarily look good on my eyes with my eye shape.  I got a chance to sit down with Benefit Canada Regional Education Manager Maddox Lu (@maddox_thinks) to pick his brain and get some tips on how to apply this liner on my hooded/folded eye lids.

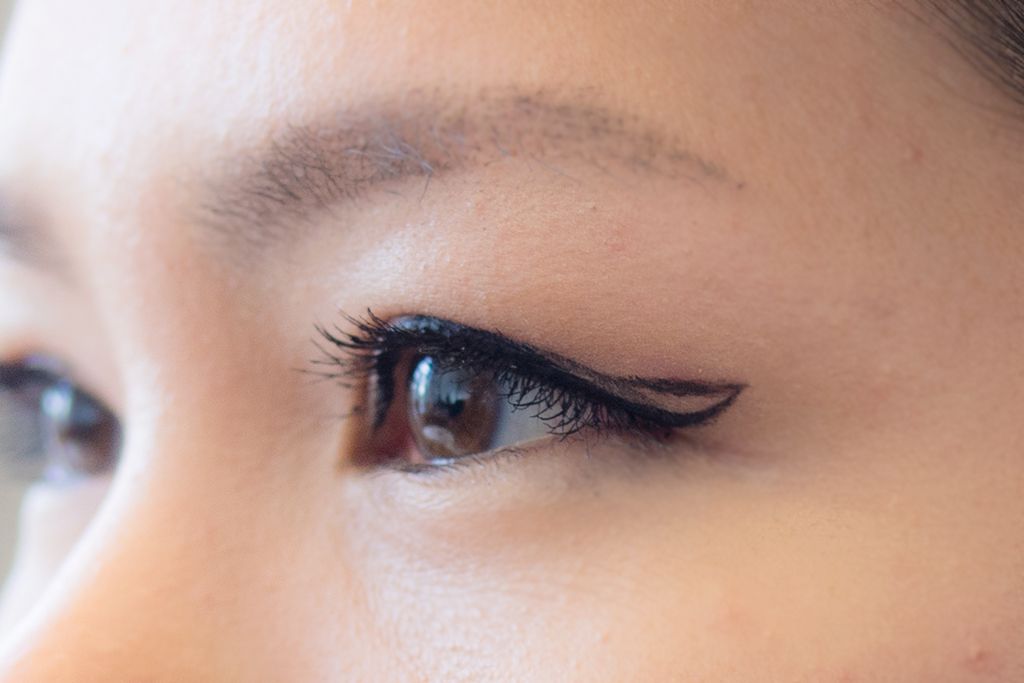
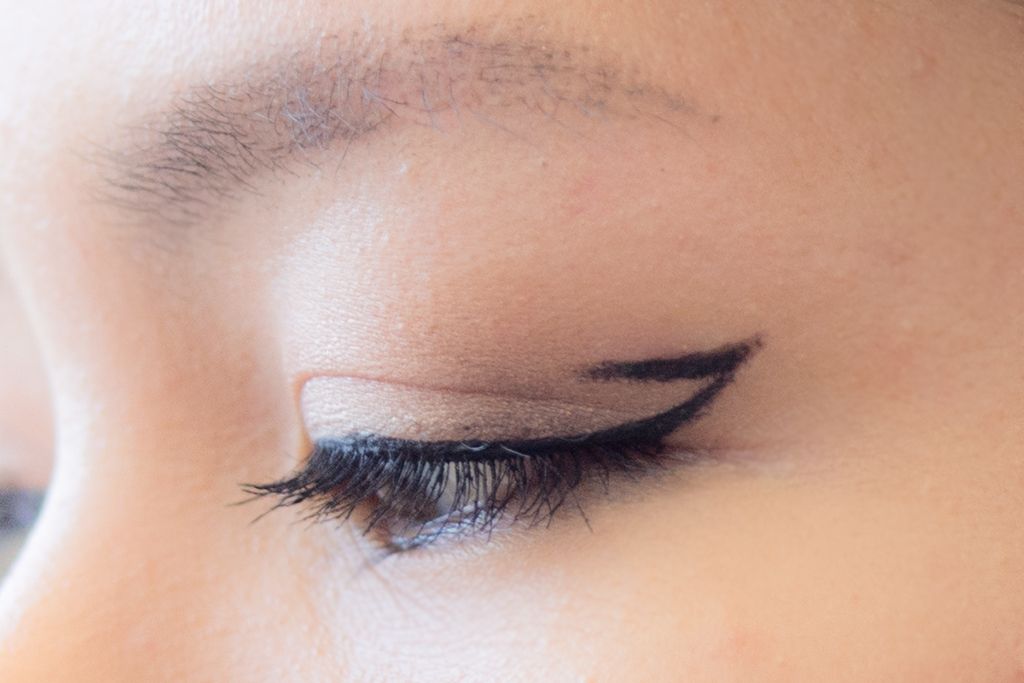
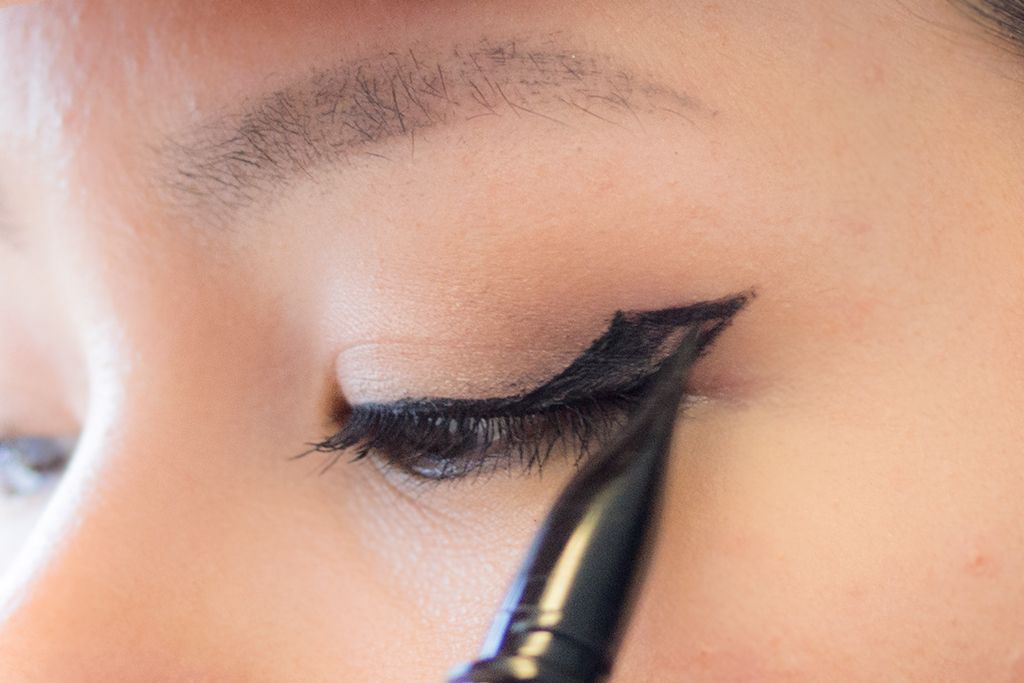
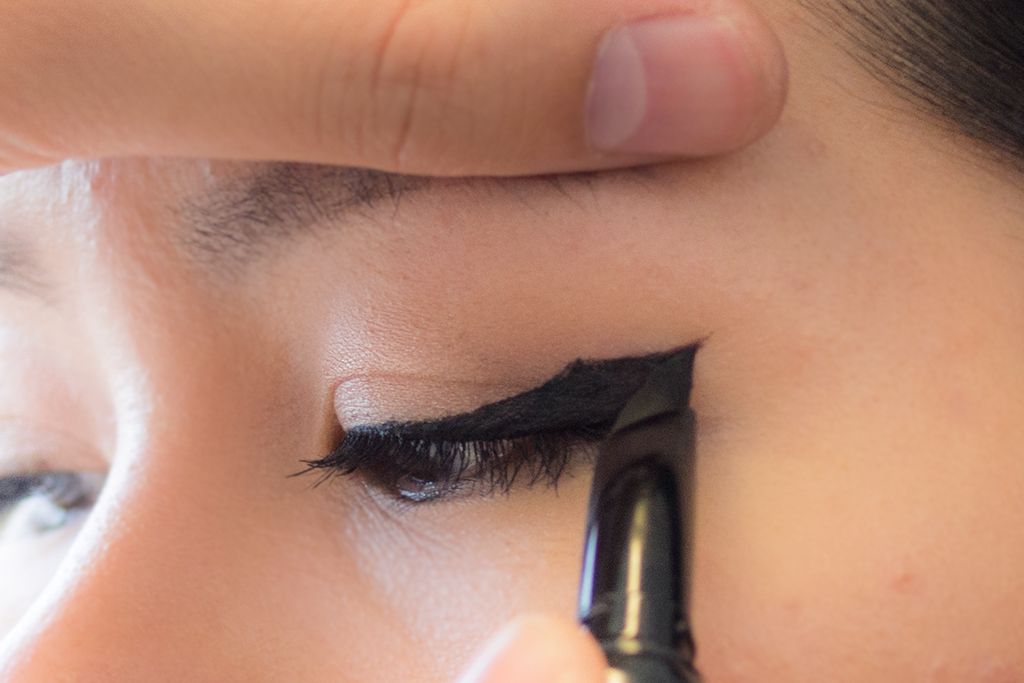
Maddox said the best liner look that suits hooded eyes the best is the "Hook" liner; as well as those with folded lids, droopy lids, "Asian eyes" (disclaimer: not trying to generalize but a lot of east Asian would have some type of folded eye lids).  Basically, if you see a broken line when you have your eyes opened with a regular winged liner on, then you will be able to benefit from the "Hook" technique.  There are a few simple steps:

Step 1: Draw a thin line like you would normal do from the outer corner to the inner corner because we want a thicker line in the outer corner.

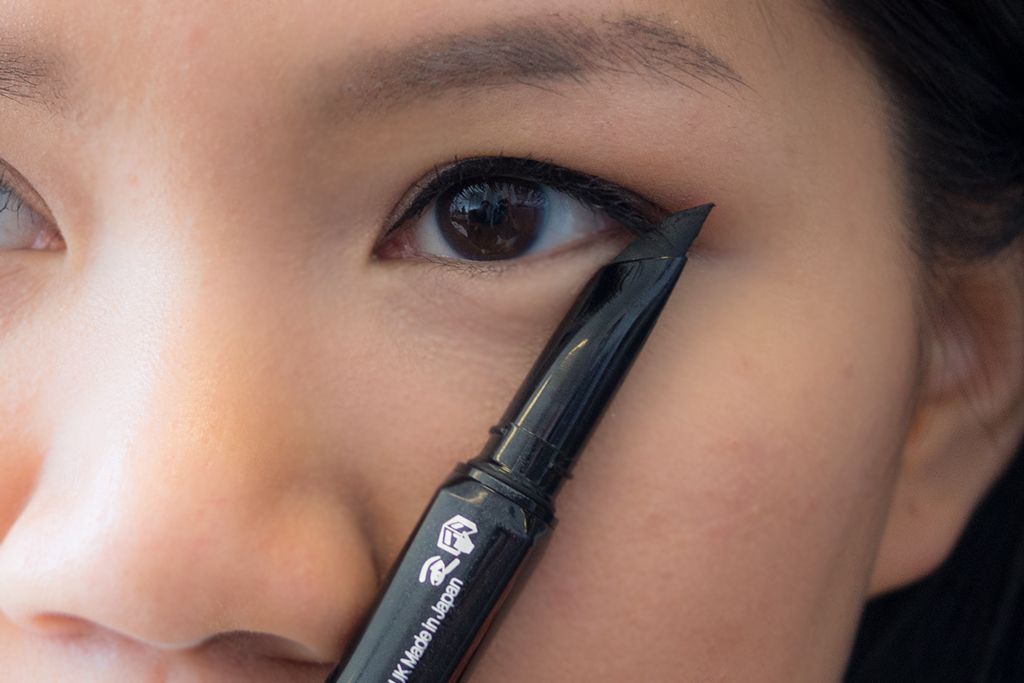
Step 2: Align your eyeliner from the corner of your nose to the outer corner of your eyes to find the ideal angle.  Then, create a wing by pressing the Accuflex Tip down on your lid.

Step 3: Fill in the wing.  And when you open your eyes, you would see a broken line because of the shape of your eyelid.

Step 4: Stare straight into your mirror.  Take the wing and connect straight across from wing to your crease, just a small line.

Step 5: Look down and connect downward from the end of the new line you just create.

Step 6: Fill in the line and you're done!

Before...

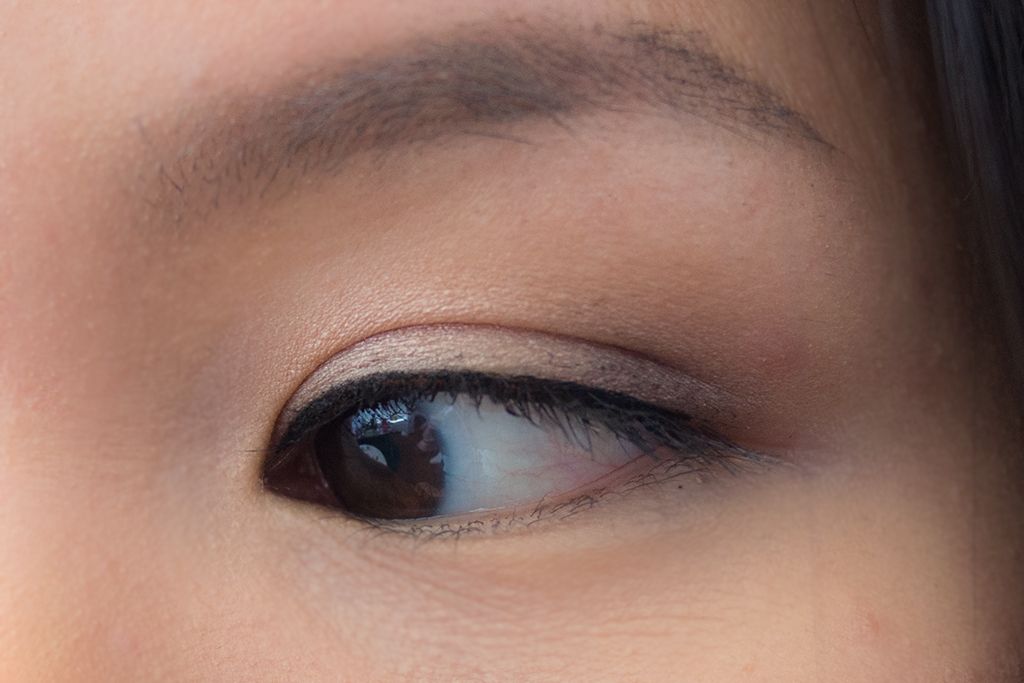
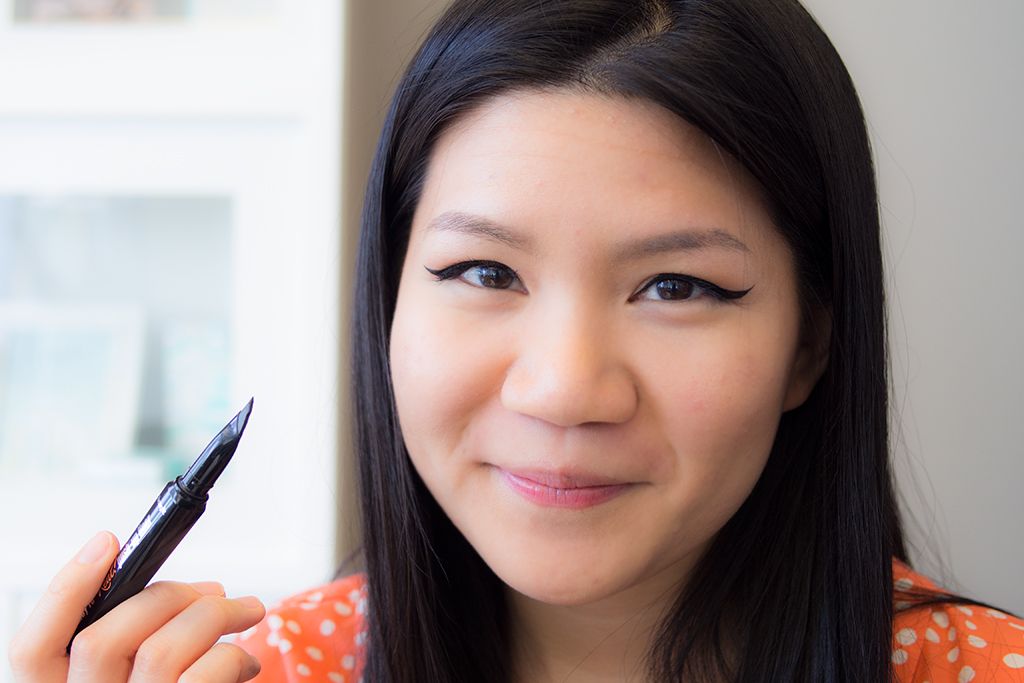
After...

Maddox gave me a lesson on this technique and demonstrated on my left eye.  I then tried it out on my right eye and got the same result too.  It might take once or twice to get used to but it's definitely a brilliant technique.


This technique is not only great for hooded eyes, but also "droopy eyes" and "Asian eyes" (most of us tend to have a fold on our lid, myself included).  It will work well too if the corner of your eyes points downward.

Okay, sounds like I need it, now what?


Well, the Benefit They're Real Push Up Liner is launching this Friday on June 27, 2014 worldwide and they are hosting launch parties across Canada (check their Facebook page to see if it's coming to your Sephora).  In Toronto, it will be held at the Sephora inside Toronto Eaton Centre.  Benebabes will be in store to help you with your liner on both Friday and Saturday (June 27-28, 2014) from 11AM to 9PM.  Guests will get a special gift if they purchase their They're Real Push Up Liner on those two dates (while supplies last).  If you're planning to go, a little bird told me there's a special secret happening between 3:30PM to 4:00PM.  If you're around, don't miss it!

Until next time,


x Rica


*Disclosure: Products mentioned in this post were provided to The Office Chic for review consideration.  As always, all the opinions expressed here are my own and are in no way influenced by any advertiser, affiliate, public relations firm or brands.

Benefit Launches They're Real Push-Up Liner | Eyeliner for Hooded Eyes Tips & Tricks

June 25, 2014 • 9 comments
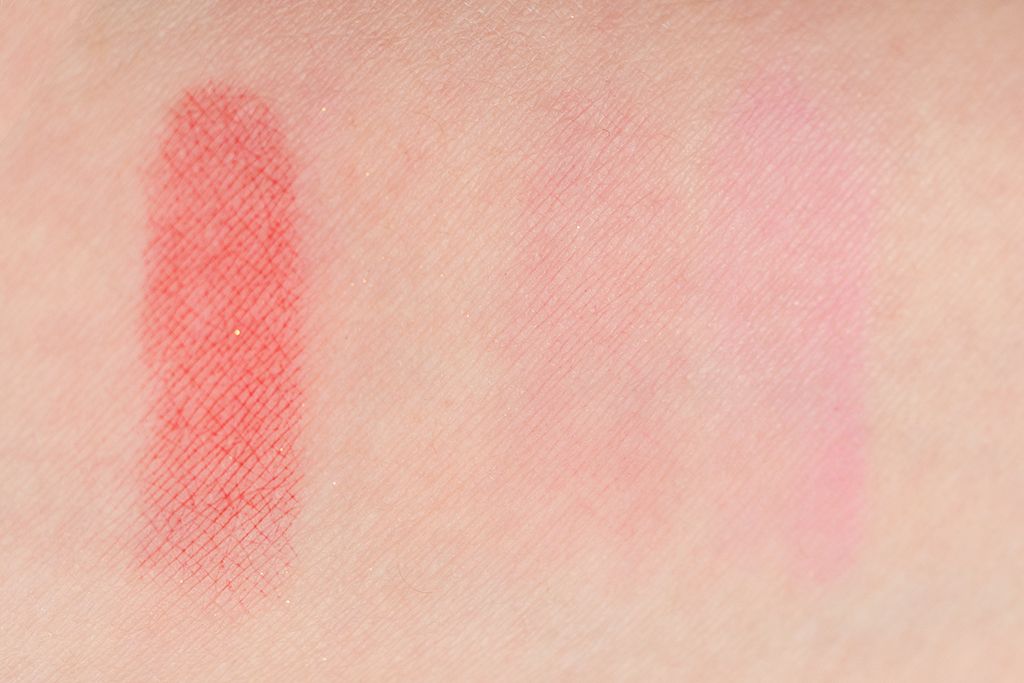
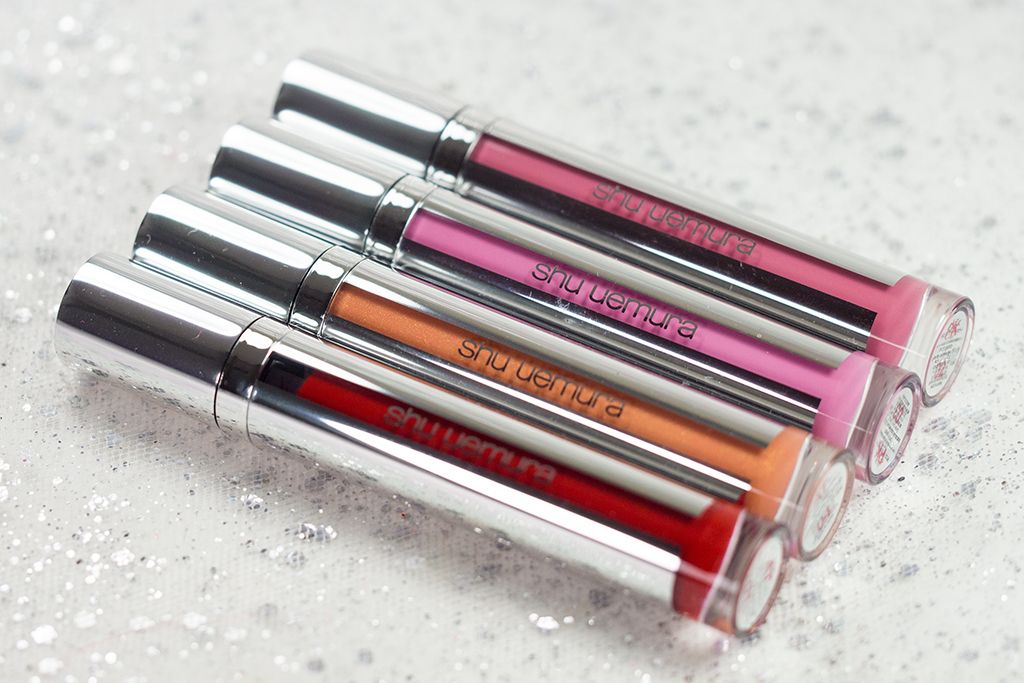
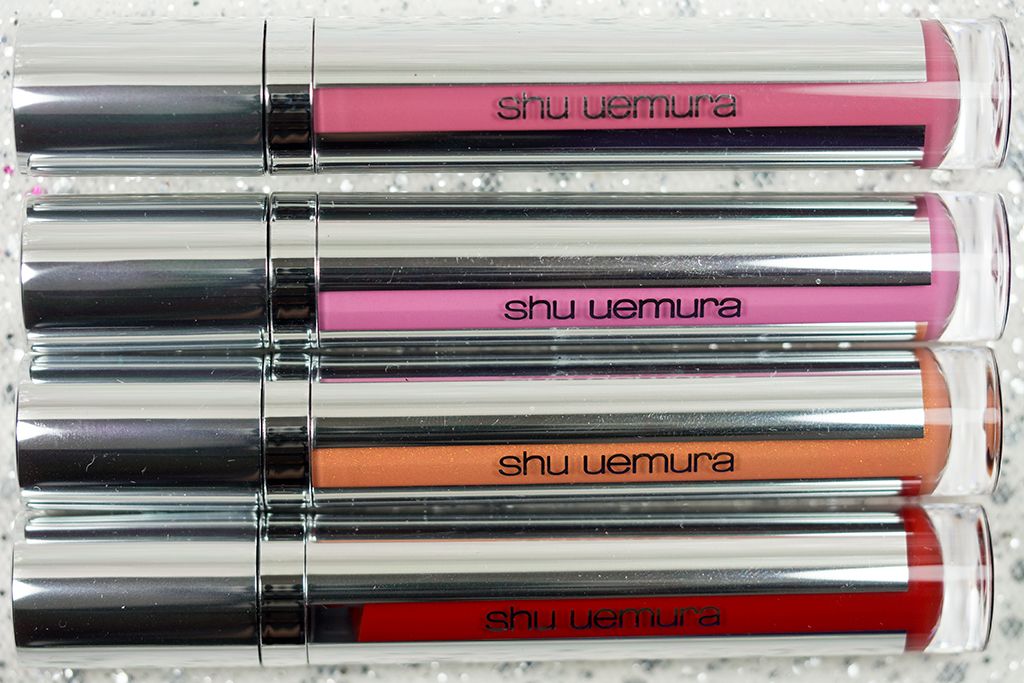
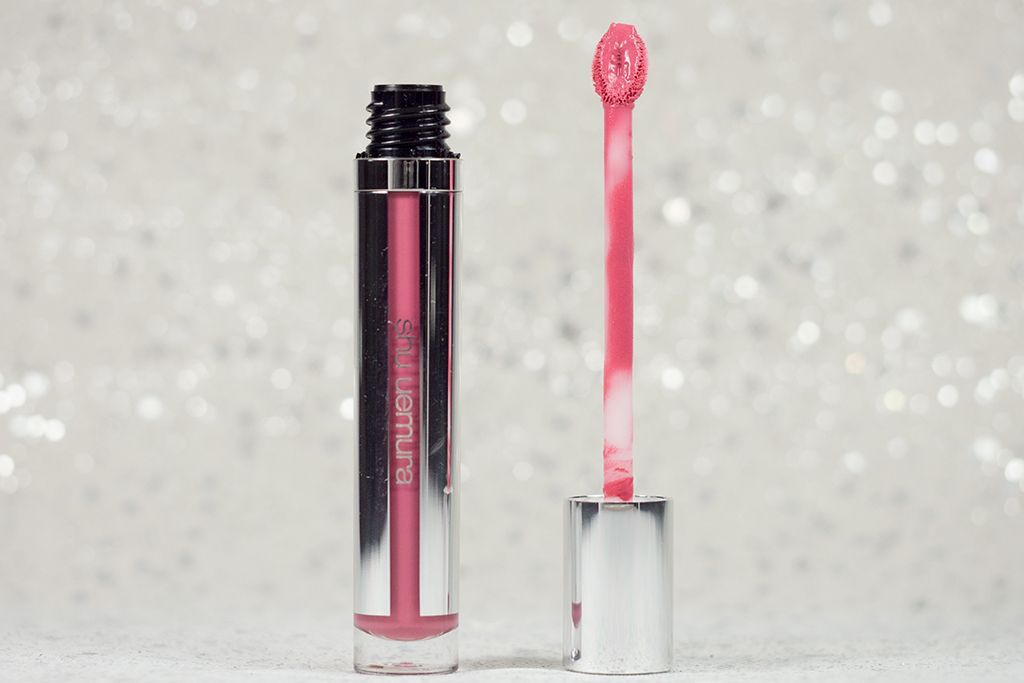
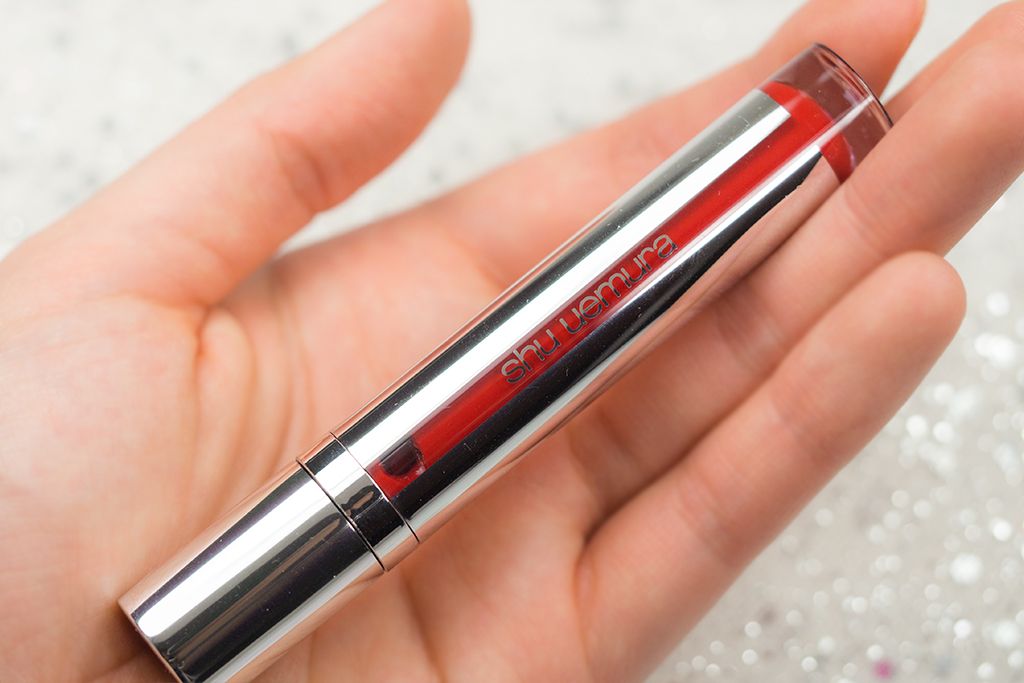
Maybe not literally, but the new Shu Uemura Tint In Gelato (CA $32 / US $28) is definitely a mouth-watering beauty product.  These brand new lip & cheek colours are coming out along with the Shu Uemura Mika for Shu collection, available starting this month.  And they are going to be permanent! The first time I saw it in action and swatched it in person, I immediately thought I would like it, and I was right.


shu-uemura-tint-in-gelato

These lip and cheek tints are very different and unique, because usually tints come in a pot or a stick when it's a cream, or in liquid form.  While these one have a creamy and moussey texture reminiscent of gelato, hence the name Tint In Gelato.  All of the shades I tried are very easy to blend and quite pigmented.  They all have a cream base, and range from glittery to glossy, to matte.
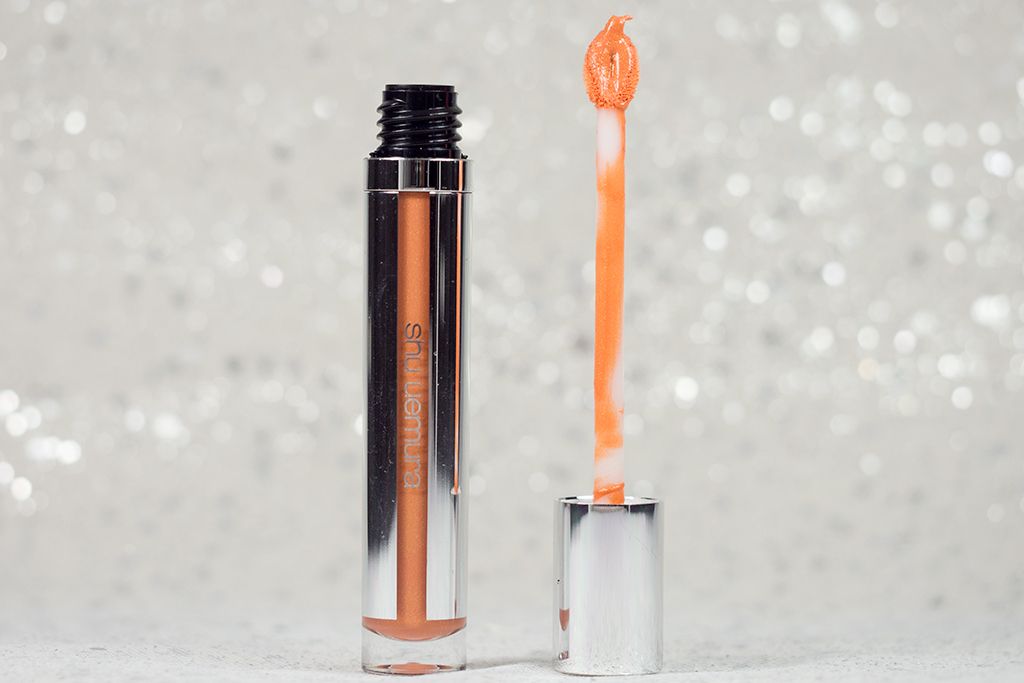

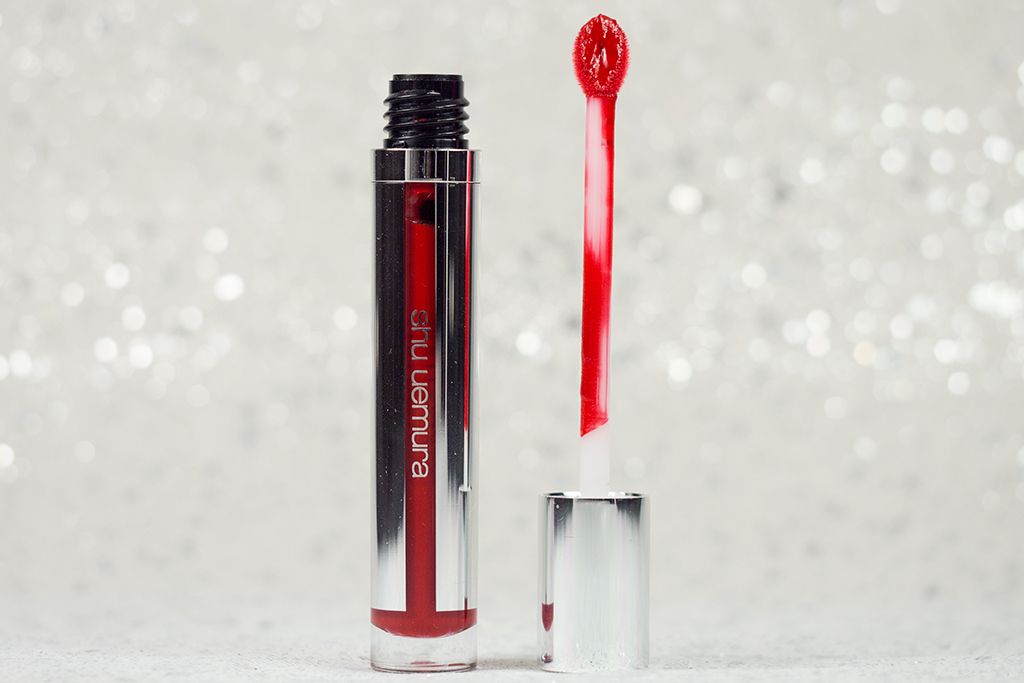
Using the wand it came with is not always my prefer way of application.  I think it works great with the glossier shade, but not as well for the matte shades.  It is the same type of wand of the Shu Uemura Gloss Unlimited.  To use it as a lip colour, I either apply it direct from the wand or use a lip brush to smooth it out.  To use it as a cheek colour, I would again, get some on the back of my hand, smooth it out with my fingers, and then dip the brush on the back of my hand like I'm applying regular cream blush and it's quite fool proof (see how I apply blush here).  I have used it with a flat top synthetic kabuki (Sigma F80) and a synthetic angled blush brush (MUFE #150), both give similar results.

The finish is a demi matte because I can see some glow show through.  Since it has add a slight stain, the staying powder is quite nice.  It last for almost a whole day (10am-6pm) on the cheeks.  It won't last as long on the lips because we need to eat and drink.  It is not a traditional stain, so it won't stay on for a long time either, but you can still see some colour even after eating (especially with AT01 Cassis Delight and PK02 Milky Framboise).

shu-uemura-tint-in-gelato
Swatches - L to R: Cassis Delight, Lemon Souffle, Milky Framboise, Sakura Creme
shu-uemura-tint-in-gelato
Stain - L to R: Cassis Delight, Lemon Souffle, Milky Framboise, Sakura Creme

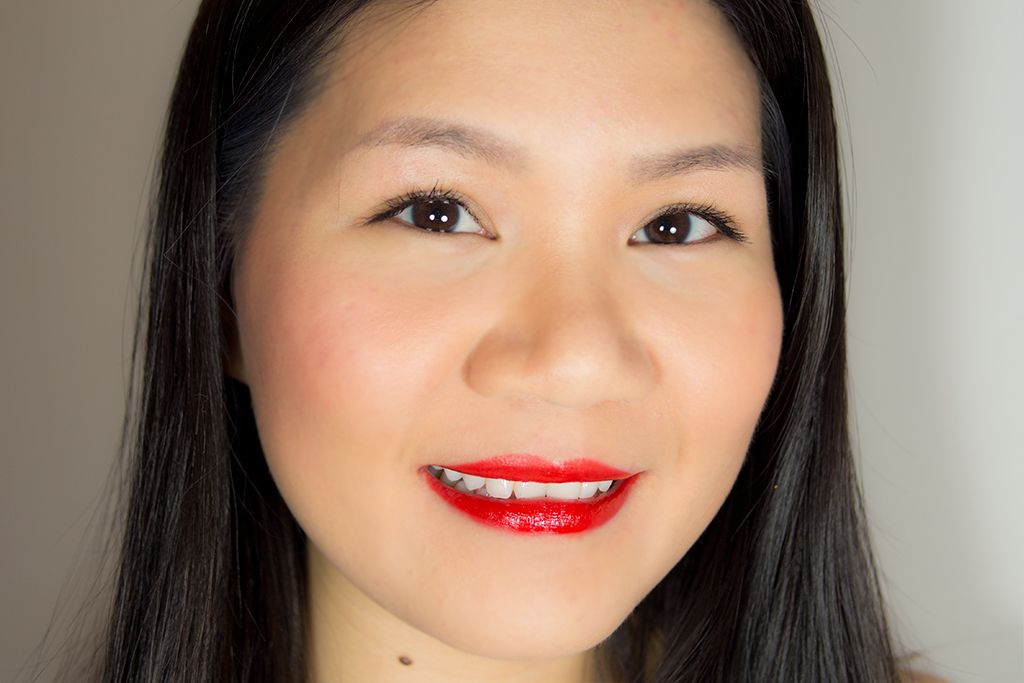
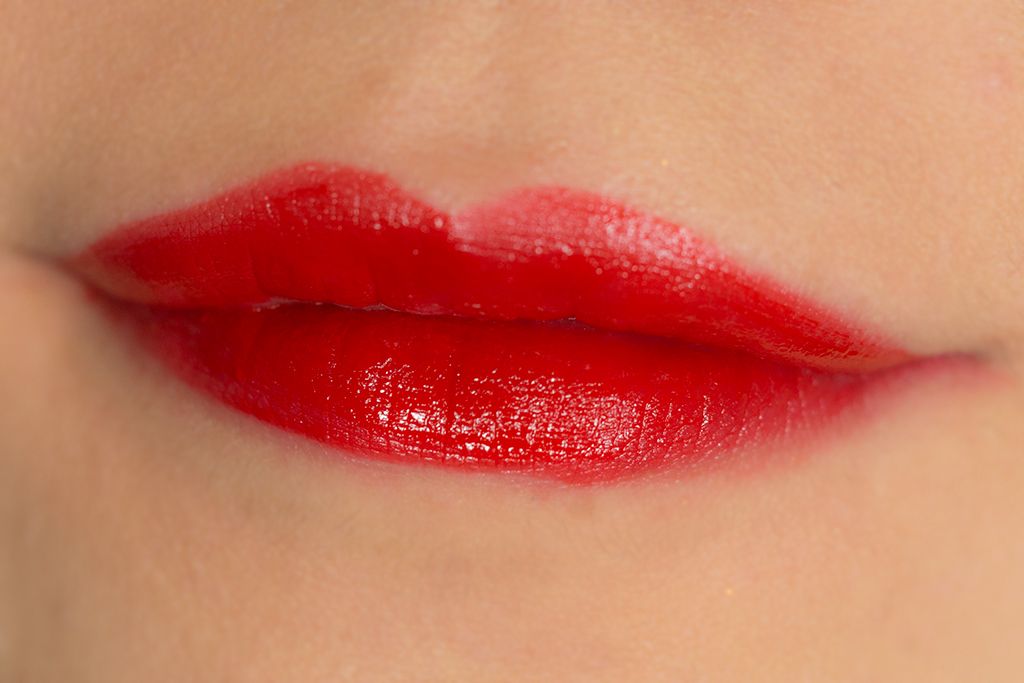
AT01 Cassis Delight is a classic red shade and has a glossy cream finish.  It is the most pigmented shade and has the most long lasting stain.  I prefer to use it as a lip colour rather than cheek colour simply because I can't seem to pull this one off.  If you're going to use it as a cheek colour, be really careful with the amount of product you use.  A very small amount goes a long way.

shu-uemura-tint-in-gelato-cassis-delight
Cassis Delight on lips & left cheek
shu-uemura-tint-in-gelato-cassis-delight-swatches

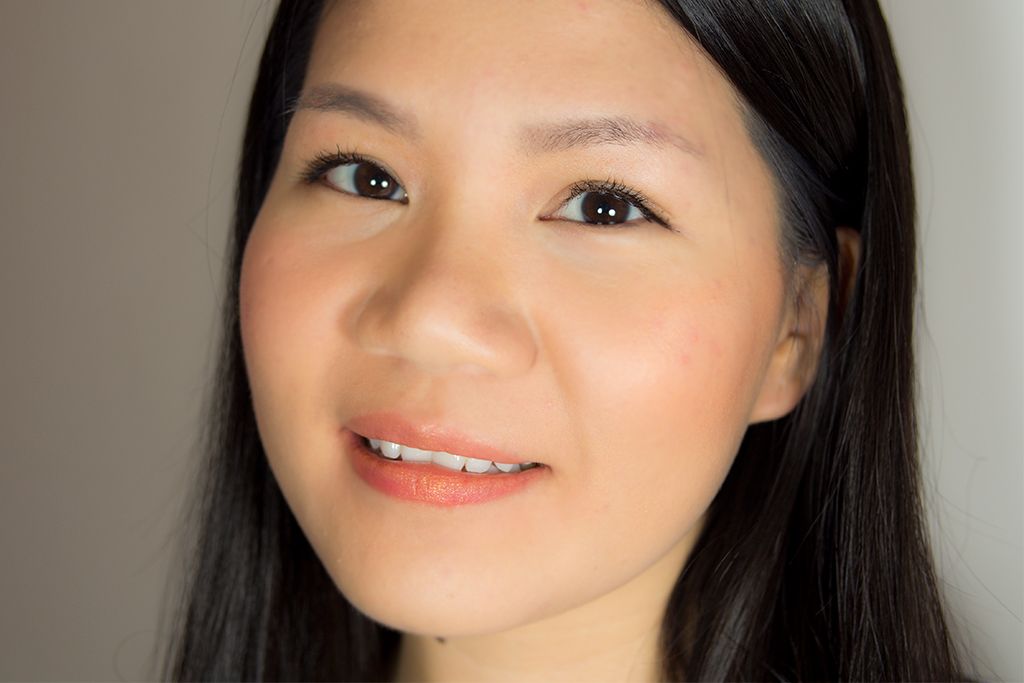
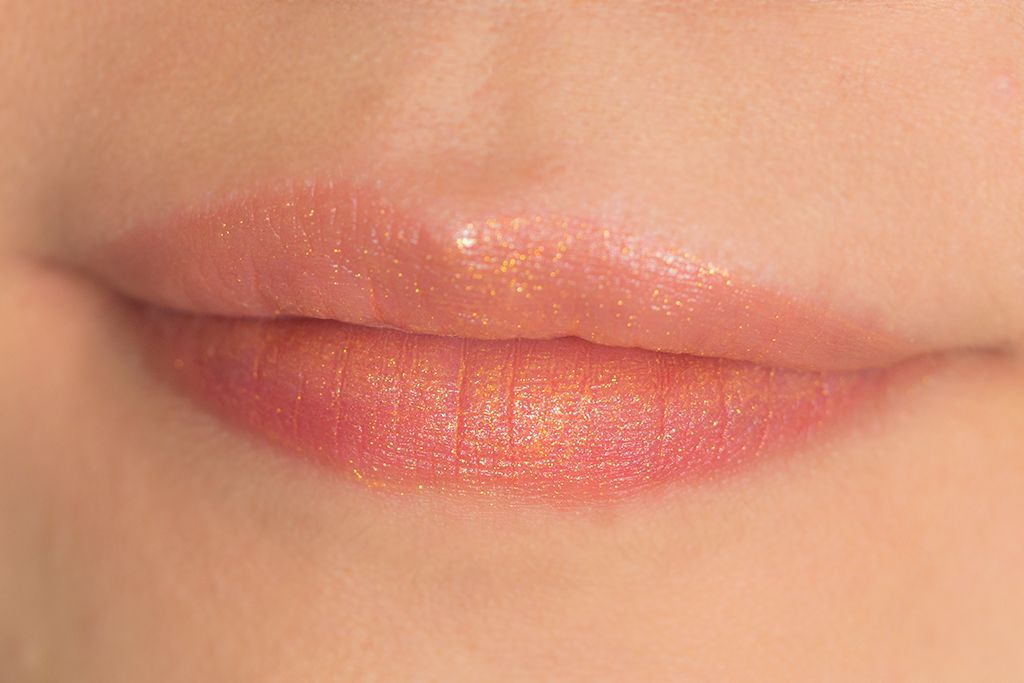
AT04 Lemon Souffle is a light tangerine colour with golden shimmer.  It is my least favourite out of the four colours I have tried because I can't get it applied evenly on the lips and the shimmer particles are too big for my liking on the cheeks either.  It also doesn't show up as nice or last as long as the other shades.

shu-uemura-tint-in-gelato-lemon-souffle
shu-uemura-tint-in-gelato-lemon-souffle-demo
Lemon Souffle on lips & right cheek
shu-uemura-tint-in-gelato-lemon-souffle-swatches

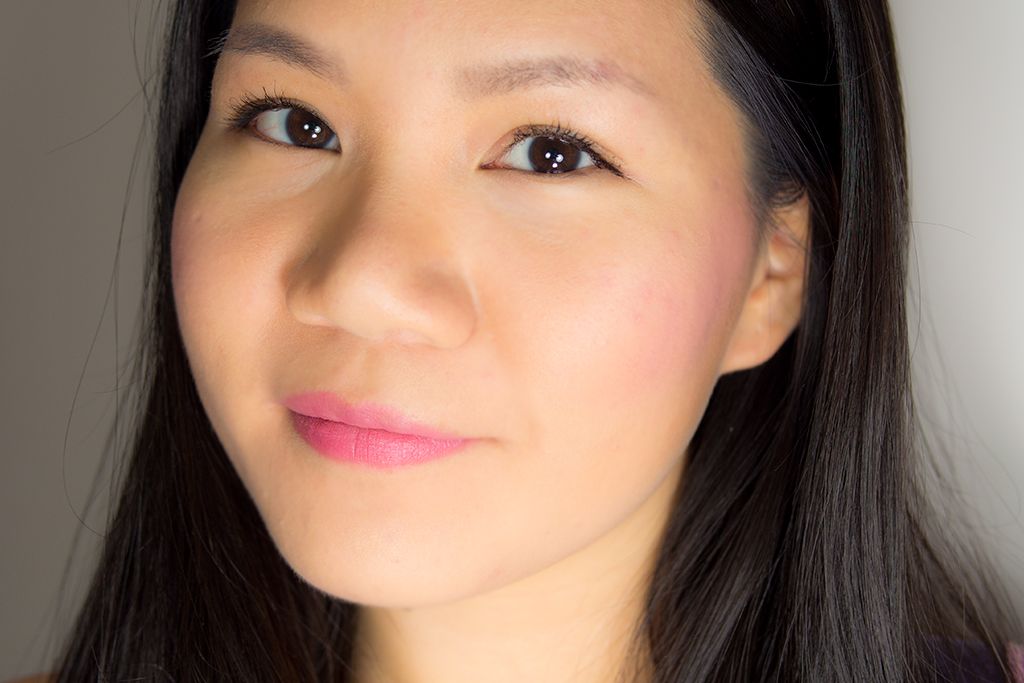
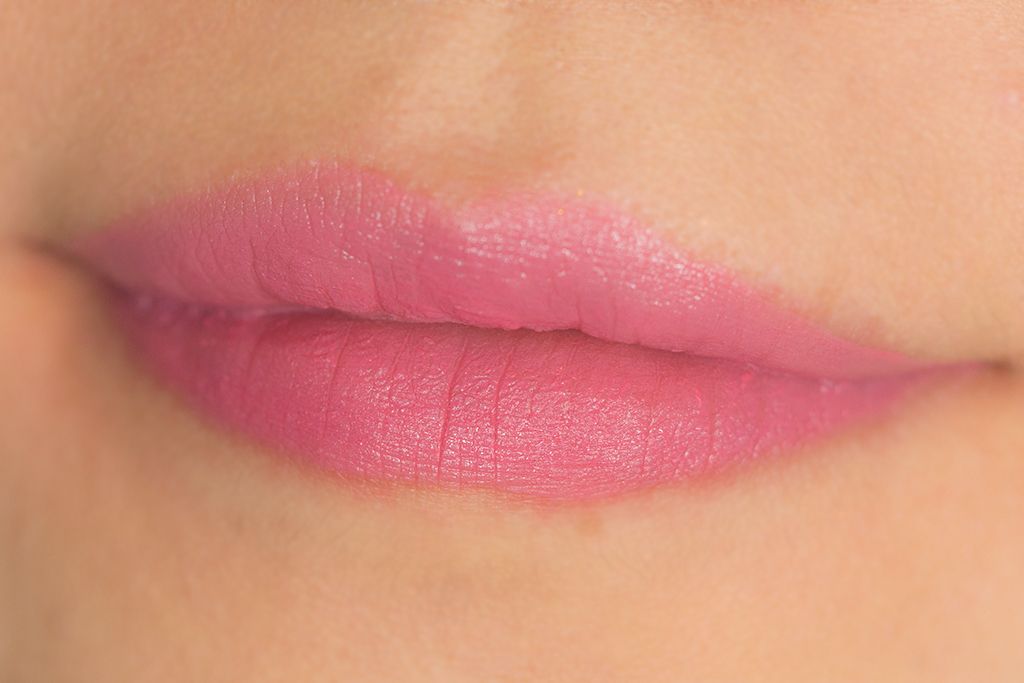
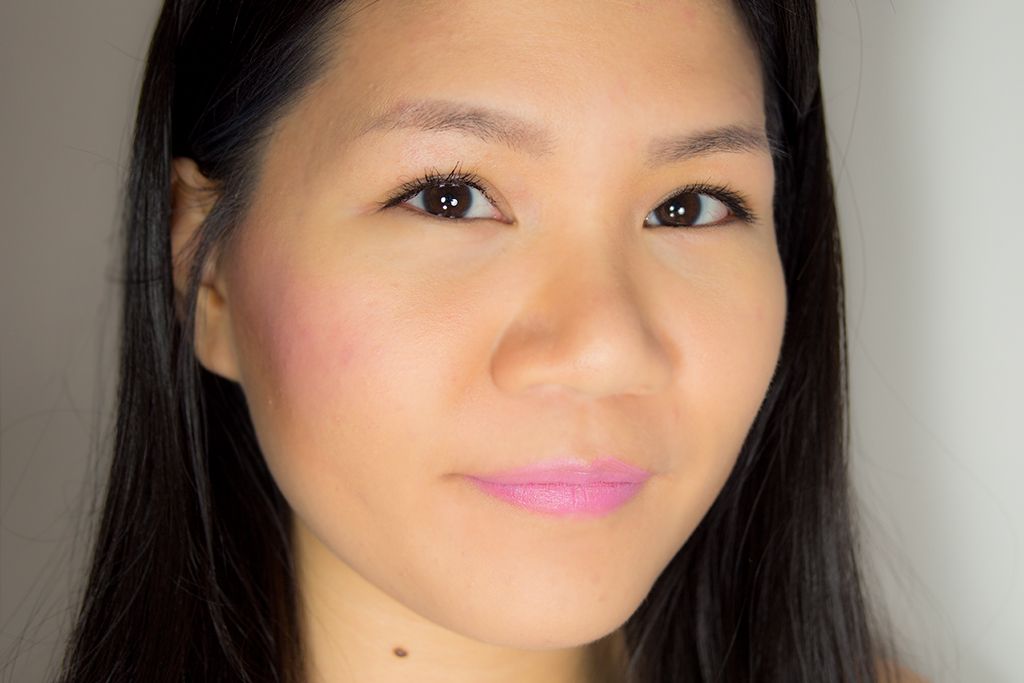
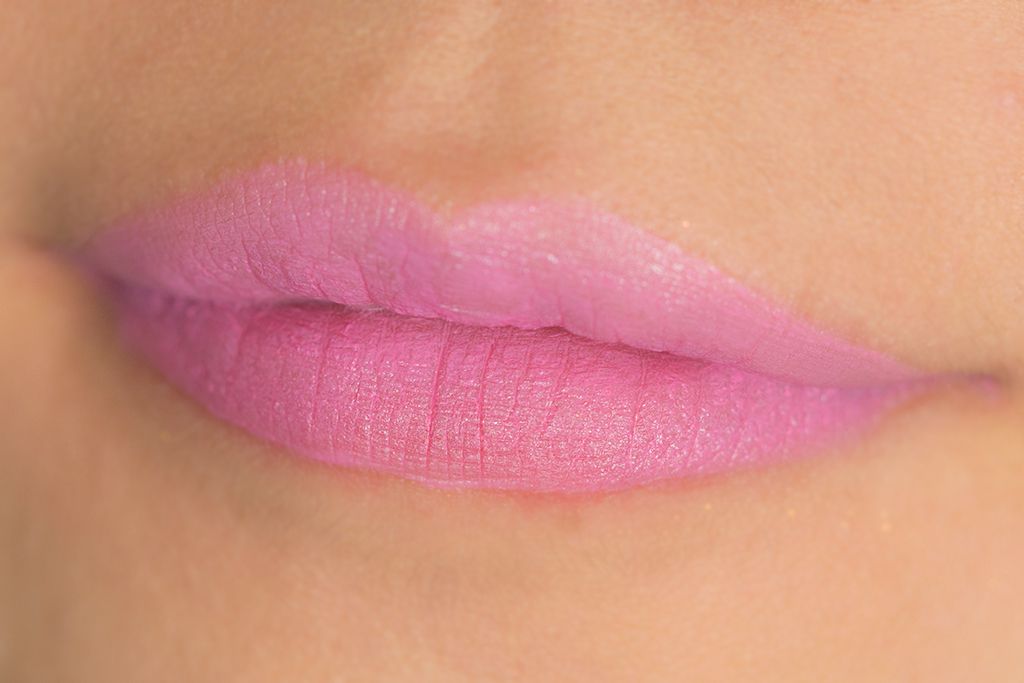
PK02 Milky Framboise is a light mauvey pink and it's my favourite out of these four shades I have tried.  It's a no brainer for me because I'm usually gravitate towards mauve shades.  It is also of a warmer tone, so it suits my skin tone better.  This might also be more universally flattering just because it's a creamy matte mauve colour.

shu-uemura-tint-in-gelato-milky-framboise-demo
Milky Framboise on lips & right cheek
shu-uemura-tint-in-gelato-milky-framboise-swatches

PK03 Sakura Creme is a cool baby pink and it also has a creamy matte finish like Milky Framboise.  It is so pretty to look at but I can't seem to get it work for me.  I think it suits cooler skin better because it's a cool tone pink.  However, the formula is just a nice as Milky Framboise.  I will try to make it work for me :P.

shu-uemura-tint-in-gelato-sakura-creme
Sakura Creme on lips & left cheek
shu-uemura-tint-in-gelato-sakura-creme-swatches

Overall, these Shu Uemura Tint In Gelato has won me over.  Their creamy formula is really something different and works really well like a moussey lipstick.  I also love that I can use them on the cheeks as well.  If you were to try any shade, I would recommend either Cassis Delight or Milky Framboise because they're my personal favourite.  I would stay far away from Lemon Souffle if you're like me and don't prefer shimmer/glitter on lips or cheeks.

Until next time,


x Rica


*Disclosure: Products mentioned in this post were provided to The Office Chic for review consideration.  As always, all the opinions expressed here are my own and are in no way influenced by any advertiser, affiliate, public relations firm or brands.

Shu Uemura Tint In Gelato are just as "delicious" as it sounds | Review, Photos & Swatches

April 3, 2014 • 11 comments